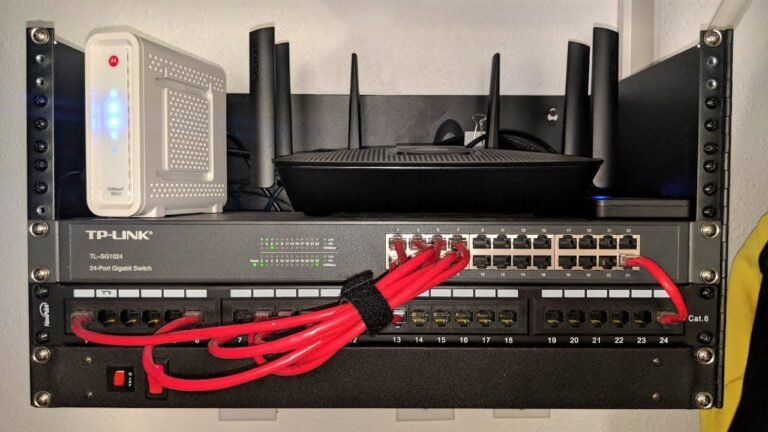
In today’s connected world, having a reliable home network is essential. Whether you’re working from home, streaming movies, gaming online, or simply browsing the web, a well-configured network ensures smooth and secure connectivity. This guide will walk you through everything you need to know about setting up a home network, from choosing the right equipment to optimizing performance and security. By the end, you’ll have a network that meets your needs and keeps your devices running seamlessly.
Why Set Up a Home Network?
A home network allows multiple devices to connect to the internet and communicate with each other. Here are some key benefits:
- Internet Sharing: Connect all your devices (smartphones, laptops, smart TVs, etc.) to a single internet connection.
- File Sharing: Easily transfer files between devices.
- Streaming and Gaming: Enjoy lag-free streaming and gaming experiences.
- Smart Home Integration: Connect smart devices like security cameras, thermostats, and voice assistants.
Step 1: Plan Your Network
Before diving into setup, it’s important to plan your network based on your needs:
- Number of Devices: Count how many devices will connect to your network.
- Coverage Area: Determine the size of your home and any dead zones.
- Usage: Identify your primary activities (e.g., streaming, gaming, or work).
Step 2: Choose the Right Equipment
Here’s a list of essential networking equipment:
1. Modem
The modem connects your home to your Internet Service Provider (ISP). Most ISPs provide a modem, but you can also purchase your own for better performance.
2. Router
The router distributes the internet connection to your devices. Look for a dual-band or tri-band router with Wi-Fi 6 support for faster speeds and better performance.
3. Ethernet Cables
For wired connections, use Cat6 or Cat7 Ethernet cables for high-speed data transfer.
4. Network Switch (Optional)
If you have multiple wired devices, a network switch expands the number of available Ethernet ports.
5. Wi-Fi Extenders or Mesh Systems
For larger homes, Wi-Fi extenders or mesh systems help eliminate dead zones and provide consistent coverage.
Step 3: Set Up Your Modem and Router
1. Connect the Modem
- Plug the modem into your ISP’s wall outlet (coaxial cable for cable internet or phone line for DSL).
- Connect the modem to a power source and turn it on.
- Wait for the modem to establish a connection (indicated by stable lights).
2. Connect the Router
- Use an Ethernet cable to connect the router’s WAN port to the modem.
- Power on the router and wait for it to boot up.
Step 4: Configure Your Router
1. Access the Router’s Admin Panel
- Open a web browser and enter the router’s IP address (usually 192.168.1.1 or 192.168.0.1).
- Log in using the default username and password (check the router’s manual).
2. Set Up Wi-Fi
- Navigate to the wireless settings.
- Create a unique SSID (network name) and a strong password.
- Choose WPA3 encryption for the best security.
3. Update Firmware
- Check for firmware updates in the router’s admin panel and install them to ensure optimal performance and security.
4. Enable Guest Network (Optional)
- Set up a separate guest network for visitors to keep your main network secure.
Step 5: Connect Your Devices
1. Wired Connections
- Use Ethernet cables to connect devices like gaming consoles, smart TVs, or desktop computers directly to the router or switch.
2. Wireless Connections
- On your devices, search for your Wi-Fi network and enter the password to connect.
Step 6: Optimize Your Network
1. Position Your Router
- Place the router in a central location for even coverage.
- Avoid placing it near walls, metal objects, or other electronics that can interfere with the signal.
2. Use Quality of Service (QoS)
- Enable QoS in your router’s settings to prioritize bandwidth for activities like gaming or video calls.
3. Monitor Network Usage
- Use your router’s admin panel or third-party apps to monitor connected devices and bandwidth usage.
Step 7: Secure Your Network
1. Change Default Login Credentials
- Replace the default username and password for your router’s admin panel with strong, unique credentials.
2. Enable Network Encryption
- Use WPA3 encryption for your Wi-Fi network to prevent unauthorized access.
3. Disable WPS
- Wi-Fi Protected Setup (WPS) can be a security vulnerability. Disable it in your router’s settings.
4. Set Up a Firewall
- Enable the built-in firewall on your router to block malicious traffic.
Step 8: Expand Your Network (If Needed)
If you have a large home or experience dead zones, consider these options:
- Wi-Fi Extenders: Place extenders in areas with weak signals to boost coverage.
- Mesh Systems: Mesh systems use multiple nodes to create a seamless network with consistent coverage.
Step 9: Test Your Network
Once everything is set up, test your network:
- Use speed test tools like Ookla or Fast.com to check your internet speed.
- Walk around your home to ensure there are no dead zones.
- Test file transfers between devices to ensure smooth communication.
Conclusion
Setting up a home network may seem complex, but with the right equipment and guidance, it’s a straightforward process. By following this guide, you’ll have a reliable and secure network that meets your needs. Whether you’re streaming, gaming, or working from home, a well-configured network ensures a seamless online experience.


